Fall is officially here! Time to break out your favorite sweater, start a bonfire, and bask in the cool Georgia air. But can you still eat s’mores with braces? And how can you exercise caution eating with braces this fall?
When you get your braces on, Dr. Gordon and Dr. Spillers will discuss which foods to avoid eating with braces and what food you can eat. If you choose Invisalign or our very own SO Clear Aligners for your orthodontic treatment, you can simply remove your aligners to indulge—as long as you brush and floss before putting your trays back in!
But this doesn’t mean you can’t celebrate fall with some delicious seasonal dishes! We’ve assembled some scrumptious braces-friendly recipes for you that are alllllll flavor and won’t cause a braces emergency!
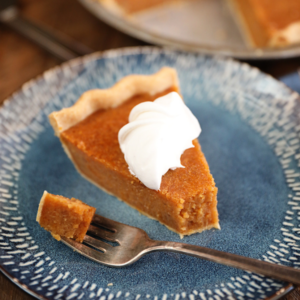
Classic Sweet Potato Pie by Southern Bite

- 1 pound sweet potatoes
- 1 cup firmly packed light brown sugar
- 2 large eggs
- 1/2 cup butter, melted
- 1 (5-ounce) can evaporated milk
- 1 teaspoon ground cinnamon
- 1/4 teaspoon ground nutmeg
- 1/4 teaspoon ground ginger
- 1/4 teaspoon salt
- 1 teaspoon vanilla extract
- 1 (9-inch) unbaked deep dish pie crust
Directions:
- Preheat the oven to 425° and line a rimmed baking sheet with aluminum foil. Wash the sweet potatoes and prick them a few times with a fork. Place them on the baking sheet and bake for about 45 minutes or until tender.Remove from the oven and allow it to cool enough to handle. Peel the potatoes when cool.
- Using a mixer, mash the potatoes until smooth. Add the sugar, eggs, and melted butter and mix to combine. Add the evaporated milk, cinnamon, nutmeg, giner, salt, and vanilla and mix until combined and smooth.
- Reduce the oven temperature to 350°F. Place the unbaked pie crust on a foil lined, rimmed baking sheet. Pour the pie filling into the crust and bake in the center of the oven for 55 to 60 minutes, or until the pie is set and a toothpick inserted in the center comes out mostly clean. Allow the pie to cool. It may sink some as it cools. Refrigerate if desired. Serve topped with whipped cream or toasted marshmallow cream, if desired.
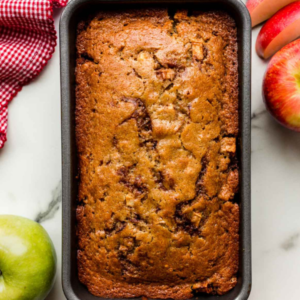
Apple Cinnamon Bread

Apples
- 1 and 1/2 cups peeled & chopped apples (1/2 inch chunks; you need about 2 medium apples)
- 1/3 cup packed light or dark brown sugar
- 1 and 1/2 teaspoons ground cinnamon
Batter
- 1 and 3/4 cups all-purpose flour (spoon & leveled)
- 1 teaspoon ground cinnamon
- 1/2 teaspoon ground nutmeg
- 1 teaspoon baking powder
- 1/2 teaspoon baking soda
- 1/4 teaspoon salt
- 1/2 cup (1 stick) unsalted butter, softened to room temperature
- 3/4 cup granulated sugar
- 2 large eggs, at room temperature
- 1/3 cup unsweetened applesauce, at room temperature*
- 1 teaspoon pure vanilla extract
- 1/2 cup whole milk, at room temperature
Directions:
- Adjust the oven rack to the lower third position (just below center) and preheat the oven to 350°F (177°C). Spray a 9×5 inch loaf pan with nonstick spray.
- Apples: Stir the apples, brown sugar, and cinnamon together. Set aside.
- Batter: Whisk the flour, cinnamon, nutmeg, baking powder, baking soda, and salt together in a large bowl. Set aside. Using a handheld or stand mixer fitted with a paddle or whisk attachment, beat the butter and granulated sugar together on high speed until smooth and creamy, about 2 minutes. Add the eggs and then beat on medium speed until combined. Scrape down the sides and up the bottom of the bowl as needed. Beat in the applesauce and vanilla extract on medium speed until combined. Mixture will look chunky and curdled– this is normal and expected. Pour the dry ingredients into the wet ingredients, turn the mixer on low speed and with the mixer running, slowly pour in the milk. Beat just until combined and do not overmix. You may need to whisk it all by hand to make sure there are no lumps at the bottom of the bowl. The batter will be sticky and slightly thick. You’ll have about 3 cups of batter.
- Pour and spread about 1/2 of the batter into the bottom of the prepared loaf pan. Spoon apples and any cinnamon/brown sugar juices leftover in the bowl evenly on top. Pour and spread remaining batter on top, making sure to scrape out every last drop of batter. Using a knife, swirl the batter down the center of the loaf pan.
- Bake for 60-75 minutes, loosely covering the bread with aluminum foil at the 30 minute mark to help prevent the top and sides from getting too brown. This is a large heavy loaf, so if your bread is taking longer, that’s completely fine. A toothpick inserted in the center of the loaf will come out clean when the bread is done. Begin checking at 60 minutes. Mine takes 70 minutes. Remove from the oven and allow the bread to cool completely in the pan set on a wire rack.
- Once cooled or nearly cooled, cut into slices and serve. (Bread falls apart if you try to slice it when it’s warm.)
- Cover and store bread at room temperature for up to 2 days or in the refrigerator for up to 1 week.
Instant Pot Pumpkin Soup

- 1 tablespoon avocado oil
- 1/3 cup chopped onions (1 small onion)
- 2 teaspoons fresh ginger , peeled
- 3 cloves garlic , sliced
- 1 15- ounce can pure pumpkin
salt and pepper , to taste - 1 teaspoon nutmeg
- 1/2 teaspoon turmeric
- 2 cups chicken broth or vegetable broth
- 1 cup full fat canned-coconut milk
Directions:
- Press the SAUTE button on your Instant Pot, once it’s hot, add oil and onions and cook until slightly soft, stirring frequently
- Stir in the ginger and garlic and cook for another 20-30 seconds until fragrant. Add the pumpkin, salt, pepper, nutmeg, turmeric and cook until warm.
- Hit CANCEL, pour in the chicken broth, and deglaze the bottom of the pot to make sure the pumpkin isn’t stuck to the bottom. Place lid on Instant Pot, turn vent to Sealing position, and hit MANUAL or PRESSURE COOK / HIGH for 5 minutes
- The Instant Pot will take a few minutes to reach pressure. Allow a 5-minute natural release, then do a gradual quick release to release remaining pressure.
- When the pin drops, open the lid, and stir. Use an immersion blender to blend the soup until slightly thick and creamy. Stir in the coconut milk and season with more salt and pepper, as needed.
- Serve with pumpkin seeds / pepitas, parsley and more coconut cream if desired.
Try out one of these recipes. Or try all three recipes in one night… No one’s judging. Carve out some family time and enjoy any of these fall recipes with your loved ones!
Clean teeth reminder: Don’t forget to brush and floss your teeth after eating sweets. It’s important that you clean your teeth and braces thoroughly to prevent bacteria from building up between your teeth, and around your brackets or wires. Excessive sugar can also wear down your enamel, and your enamel is essential for maintaining strong teeth.
If you have any questions about eating with braces or you have a question about your child’s treatment, please don’t hesitate to reach out to us. We love hearing from you.
We’re here to guide you through your treatment process, from your very first visit, to your last appointment.
If you’re looking for a top orthodontist in Macon or Warner Robins, we’d love to meet you! Request a complimentary exam for you or your child today.


